Win7批處理優化服務|Win7建服務項優化批處理文件
- 2020-06-04 10:55:03 分類:幫助
系統有不少的服務,但不是每個服務我們都用得上,有些服務,我們用不上的可以關閉,但是手動去關閉會有些麻煩。這篇文章是本站給大家帶來的win7建服務項優化批處理文件方法教程,大家可以參考命令行的寫法,自己進行操作。
方法/步驟:
1、右鍵點擊桌面空白處,在打開的菜單項中,選擇新建文本文檔;

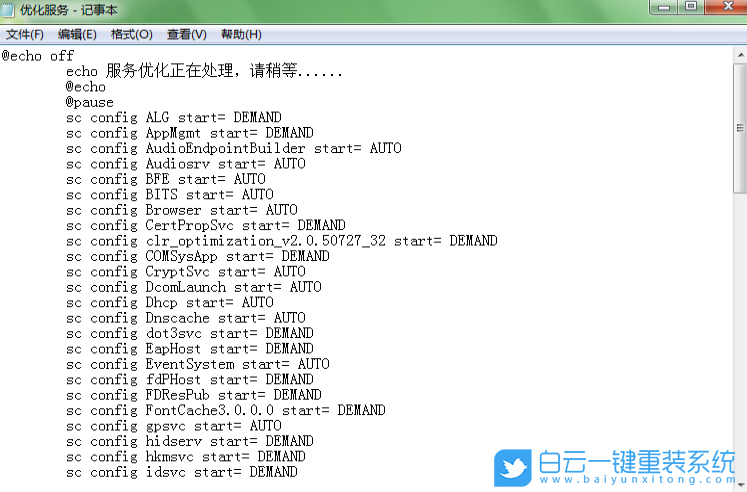
2、復制粘貼以下代碼到記事本文件中:
@echo off
echo 服務優化正在處理,請稍等......
@echo
@pause
sc config ALG start= DEMAND
sc config AppMgmt start= DEMAND
sc config AudioEndpointBuilder start= AUTO
sc config Audiosrv start= AUTO
sc config BFE start= AUTO
sc config BITS start= AUTO
sc config Browser start= AUTO
sc config CertPropSvc start= DEMAND
sc config clr_optimization_v2.0.50727_32 start= DEMAND
sc config COMSysApp start= DEMAND
sc config CryptSvc start= AUTO
sc config DcomLaunch start= AUTO
sc config Dhcp start= AUTO
sc config Dnscache start= AUTO
sc config dot3svc start= DEMAND
sc config EapHost start= DEMAND
sc config EventSystem start= AUTO
sc config fdPHost start= DEMAND
sc config FDResPub start= DEMAND
sc config FontCache3.0.0.0 start= DEMAND
sc config gpsvc start= AUTO
sc config hidserv start= DEMAND
sc config hkmsvc start= DEMAND
sc config idsvc start= DEMAND
sc config IKEEXT start= AUTO
sc config IPBusEnum start= DEMAND
sc config KeyIso start= DEMAND
sc config LanmanServer start= AUTO
sc config LanmanWorkstation start= AUTO
sc config lltdsvc start= DEMAND
sc config lmhosts start= AUTO
sc config MMCSS start= AUTO
sc config MpsSvc start= AUTO
sc config msiserver start= DEMAND
sc config napagent start= DEMAND
sc config Netlogon start= DEMAND
sc config Netman start= DEMAND
sc config netprofm start= AUTO
sc config NetTcpPortSharing start= DISABLED
sc config NlaSvc start= AUTO
sc config NOD32krn start= AUTO
sc config nsi start= AUTO
sc config PlugPlay start= AUTO
sc config ProfSvc start= AUTO
sc config RasAuto start= DEMAND
sc config RasMan start= DEMAND
sc config RemoteAccess start= DISABLED
sc config RpcLocator start= DEMAND
sc config RpcSs start= AUTO
sc config SamSs start= AUTO
sc config SCardSvr start= DEMAND
sc config SCPolicySvc start= DEMAND
sc config SENS start= AUTO
sc config SharedAccess start= DISABLED
sc config ShellHWDetection start= AUTO
sc config slsvc start= AUTO
sc config SLUINotify start= DEMAND
sc config SNMPTRAP start= DEMAND
sc config SSDPSRV start= DEMAND
sc config SstpSvc start= DEMAND
sc config SysMain start= AUTO
sc config TapiSrv start= DEMAND
sc config TBS start= AUTO
sc config Themes start= AUTO
sc config THREADORDER start= DEMAND
sc config TrustedInstaller start= DEMAND
sc config upnphost start= DEMAND
sc config UxSms start= AUTO
sc config vds start= DEMAND
sc config W32Time start= AUTO
sc config wcncsvc start= DEMAND
sc config WcsPlugInService start= DEMAND
sc config WinHttpAutoProxySvc start= DEMAND
sc config Winmgmt start= AUTO
sc config Wlansvc start= DEMAND
sc config wmiApSrv start= DEMAND
sc config WMPNetworkSvc start= DEMAND
sc config wscsvc start= AUTO
sc config wuauserv start= AUTO
sc config wudfsvc start= DEMAND
@pause
echo.
echo.&echo 優化完成!任意鍵退出
echo. & pause>nul
3、另存為的時候,注意文件名要后綴帶有 .bat 的文件;

所用命令意思:

SC 用于啟動服務控制 器的命令行程序
config 命令參數,意思是永久更改服務配置,說白了就是將服務項設置為"自動,手動,禁用"
后面跟的就是服務名稱了
"="號后的就是"自動,手動,禁用",AUTO - 自動,DEMAND - 手動,DISABLED - 禁用
此時批處理文件已經制作完成,大家可以雙擊打開該文件執行。以上就是Win7批處理優化服務|Win7建服務項優化批處理文件文章,如果這篇文章的方法能幫到你,那就收藏白云一鍵重裝系統網站,在這里會不定期給大家分享常用裝機故障解決方法。


重裝xp系統如何讓桌面圖標陰影消失?不少用戶使用網絡上的重裝xp系統工具后發現,電腦桌面上的各種軟件圖標一大堆,甚至某些用戶的桌面圖標背后有陰影,這


Win10自帶一鍵重裝系統|聯想一鍵恢復出廠系統有不少使用Win10系統的用戶,在電腦遇到無法解決問題的時候,就只想到了重裝系統。其實Win10也是有自帶一鍵重裝系統功能